Glamping Essentials: What to Pack for a Weekend Glamping Trip
What should you pack for a weekend Glamping Trip? We’ve got answers!
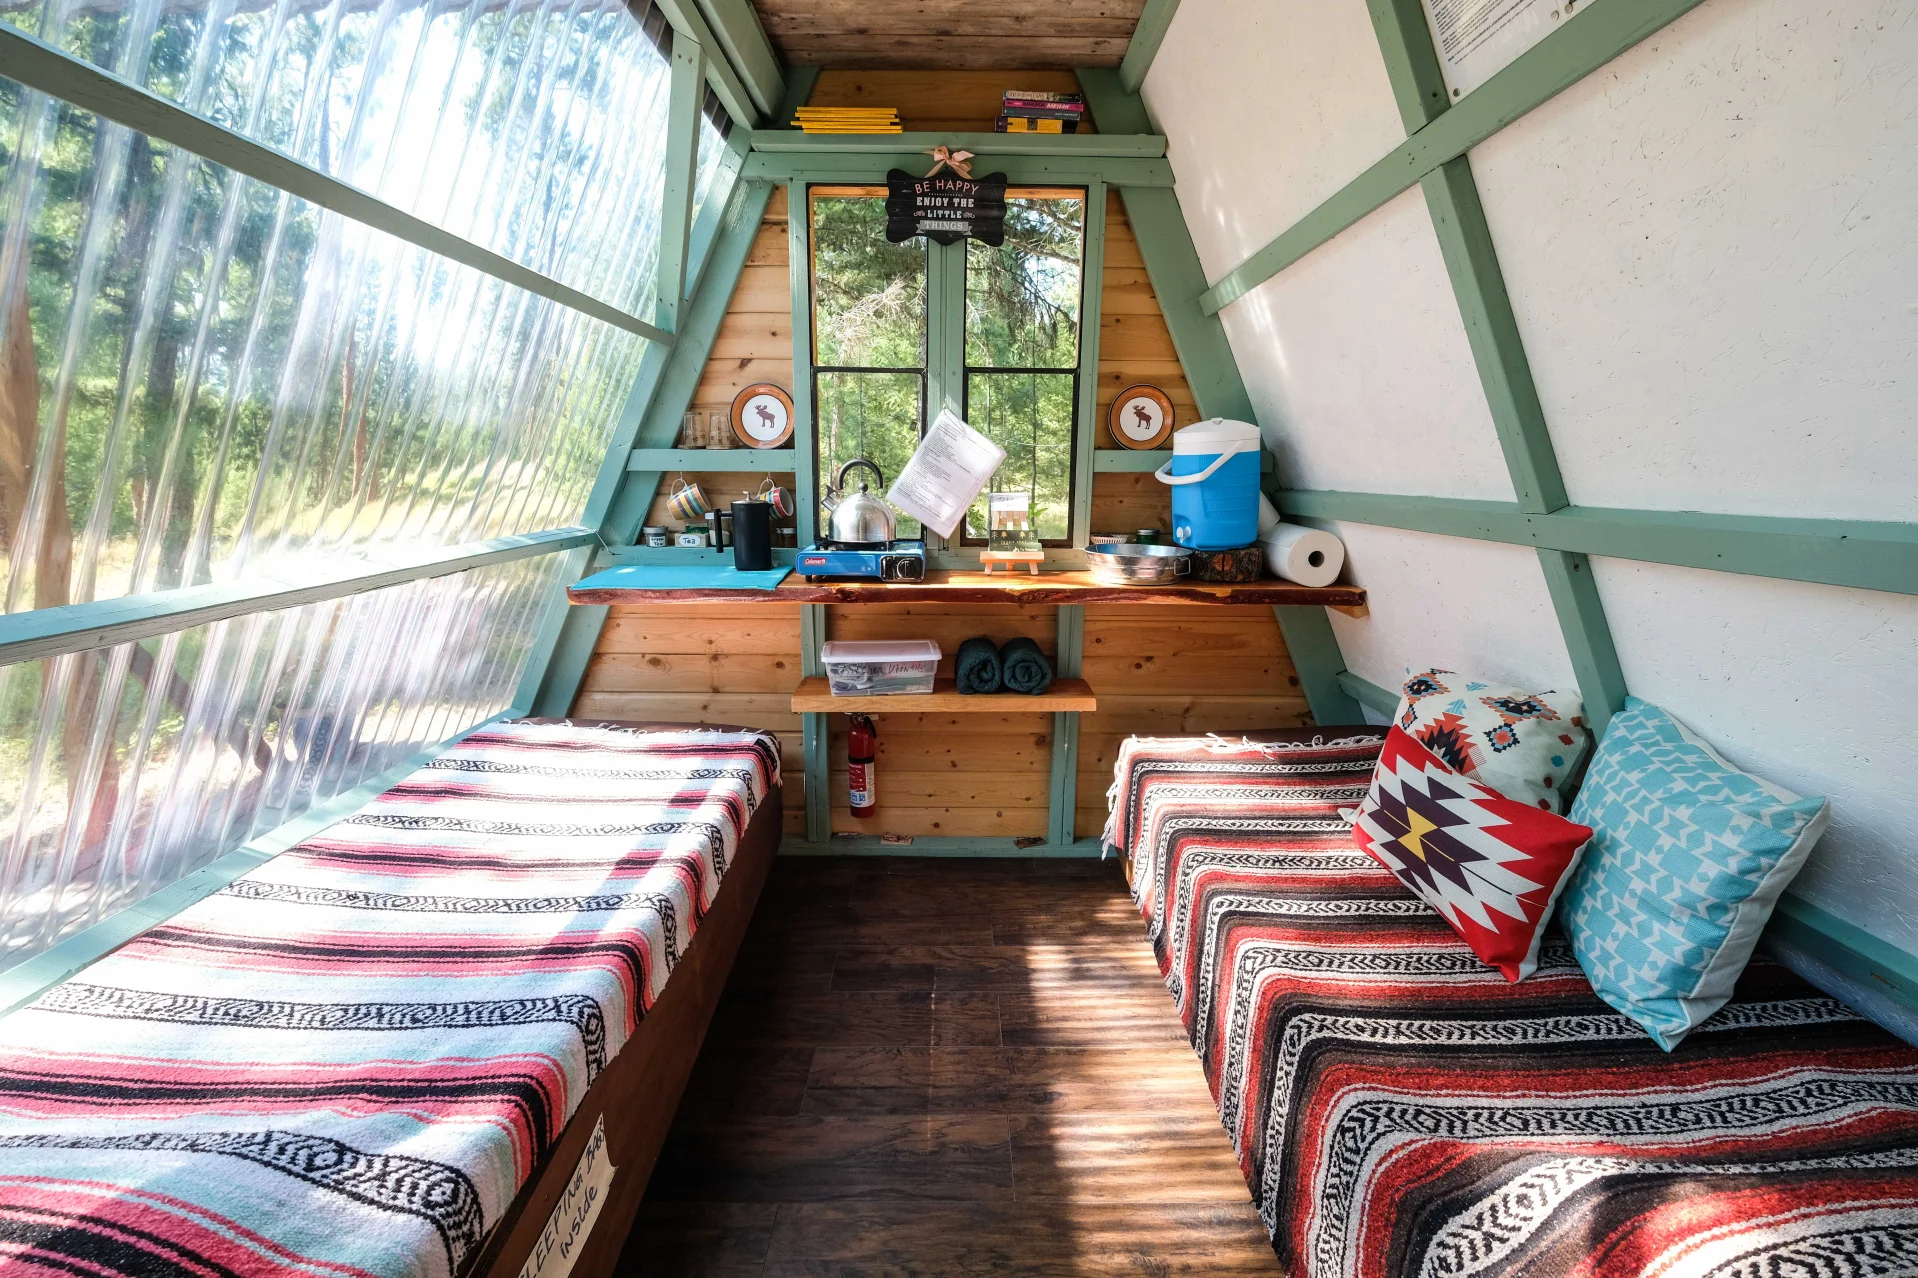
When you’re living or staying in the mountains, bringing warmer clothing is always a must, because higher elevations usually bring cooler temps at night, no matter how hot the day’s temps were. In an attempt to help our guests pack for their adventures in the woods this summer, we’ve put together a list of items that are necessary to pack when going on a Glamping Trip (like The Hohnstead Glamping Cabins). Whether you’re a seasoned glamper or a first-timer, having the right items can make all the difference.
What Is Glamping?
Before we dive into the packing list, let’s clarify what glamping is. Imagine if a hotel and a campsite had a baby – that’s glamping! Glamping sites provide pre-set tents with beds, blankets, and other comforts. However, the bathroom is usually separate, and you won’t need to bring your entire outdoor arsenal. It’s like camping, but with a touch of luxury.
Here are the essentials you’ll want to pack for your glamping adventure:
clothing
Casual clothing for lounging around
Activewear clothing for hiking /doing Scavenger Hunt / splitting wood/ archery activities
Yoga clothing if you plan to do morning stretching
Swimwear / swim shoes for ease of exit
Cute concert outfit (for Kettlehouse Amphitheater) with a warm sweater or jacket for nighttime
shoes
Flip flops or socks when inside your cabin
Hiking shoes or sneakers which may get muddy
Casual shoes for day trips to town or to see a concert in.
accessories / other
Sunglasses
Sunhat or baseball hat
Day pack for hiking and walks
Water bottle
Sunscreen
Charging cables
Chapstick
Moisturizing Lotion (Montana summers are dry!)
layers
Sweatshirt or sweater for those chilly evenings, you’re almost at 4,000ft!
Fleece or puffy jacket for extra warmth and layering (it has snowed on our guests in May and September) Also nice when visiting permanently snowed in Glacier NP
Base layer (long underwear) for sleeping, lounging and ‘just in case’
Wool socks are great to wear during all seasons
Beenie / a warm hat
pet companions
Dog Food
Dog Treats
Dog Leash / collar / harness
Dog Bed
Dog Toys, bring extra as you may lose them in the woods
Dog’s warm sweater/jacket for those cool Montana nights
Dog’s blanket for those chilly nights
Portable water bottles for road trips
Water dish / food bowl
Any medications / supplements
Remember, glamping is about enjoying nature without sacrificing comfort. So pack wisely, and get ready for an unforgettable outdoor experience!
Glamping Essentials: What to Pack for a Weekend Glamping Trip
Glamping Essentials: What to Pack for a Weekend Glamping Trip
Cabin Core Ideas for Your Bathroom
Check out our selection of Cabin Core Items for The Bathroom.
Our guests frequently compliment our interior design choices, such as our mountains, wildlife and nature-inspired wall decor, kitchen accessories, lamps, rugs, and many others. We decided to share with you our favorite cabin finds. Even if you don’t live in the cabin in the woods, decorating with Cabin Core in mind can help surround you with warm blankets, candlelit evenings, motivational wall decorations and inspirational items that remind you to get outside.
what exactly is cabin core?
Cabincore is a clothing and decor style that's inspired by remote, woodsy locations and evokes a cozy, rustic cabin feel. It's similar to cottagecore and naturecore aesthetic, but with more earthy tones, like greens and browns, and a darker, moodier vibe. Cabincore motifs include:
Colors
Faded paint in olive, terracotta, and rusty tones, as well as hints of forest green
Materials
Thick, textured rugs, faux sheepskin pelts, and thick blankets
Decor
Ornate embroidery, lots of wood, candles, vases of flowers or dried grasses, and nature-inspired art
Motifs
Cabins, forests, hiking, pinecones, forest animals, muddy paths, vegetable patches, gloomy or cloudy days, autumnal seasons, streams, fishing, cold weather, and fireplaces
WHAT CABIN CORE ITEMS CAN I include in THE Bathroom?
Materials
Natural Wood: Use reclaimed or distressed wood for accents like shelving, vanities, or wall paneling.
Stone and Slate: Incorporate stone tiles or accents for a rugged feel.
Color Palette
Earthy Tones: Opt for warm, muted colors like browns, greens, and deep reds to create a natural atmosphere.
Neutral Hues: Soft whites and creams can balance the darker elements.
Textiles
Plaid or Flannel Patterns: Use towels and shower curtains featuring plaid or flannel designs for a cozy touch.
Natural Fibers: Choose rugs and bath mats made from jute, cotton, or wool.
Decor Elements
Wooden Accessories: Incorporate wooden shelves, baskets, or storage containers.
Nature-Inspired Decor: Add items like antler decor, pinecones, or botanical prints to enhance the cabin vibe.
Lighting
Rustic Fixtures: Use lantern-style or wrought-iron light fixtures to add character.
Warm Lighting: Soft, warm lighting creates a welcoming ambiance.
Accessories
Vintage Finds: Look for vintage or antique items to add charm, like old mirrors or rustic soap dispensers.
Plants: Incorporate greenery with potted plants or dried flowers for a natural touch.
This page contains product affiliate links. We may receive a commission if you make a purchase after clicking on one of these links at no additional cost to you. We appreciate your support.
Cabin Core Ideas for your Kitchen
Check out our selection of Cabin Core Items for The Kitchen.
Our guests frequently compliment our interior design choices, such as our mountains, wildlife and nature-inspired wall decor, kitchen accessories, lamps, rugs, and many others. We decided to share with you our favorite cabin finds. Even if you don’t live in the cabin in the woods, decorating with Cabin Core in mind can help surround you with warm blankets, candlelit evenings, motivational wall decorations and inspirational items that remind you to get outside.
what exactly is cabin core?
Cabincore is a clothing and decor style that's inspired by remote, woodsy locations and evokes a cozy, rustic cabin feel. It's similar to cottagecore and naturecore aesthetic, but with more earthy tones, like greens and browns, and a darker, moodier vibe. Cabincore motifs include:
Colors
Faded paint in olive, terracotta, and rusty tones, as well as hints of forest green
Materials
Thick, textured rugs, faux sheepskin pelts, and thick blankets
Decor
Ornate embroidery, lots of wood, candles, vases of flowers or dried grasses, and nature-inspired art
Motifs
Cabins, forests, hiking, pinecones, forest animals, muddy paths, vegetable patches, gloomy or cloudy days, autumnal seasons, streams, fishing, cold weather, and fireplaces
WHAT CABIN CORE ITEMS CAN I FIND
FOR THE KITCHEN?
Decorative Elements from Nature: Decorative items might include pine cones, antlers, dried flowers, or botanical prints. These elements bring the outdoors inside and contribute to the rustic ambiance.
Vintage Appliances: If there are appliances visible, they might be vintage-style or intentionally designed to fit the rustic aesthetic.
Cozy Textiles: Look for comfortable, soft textiles like plaid or checkered tablecloths, curtains, or cushions. These textiles add to the cozy feel of the space.
Warm Colors: Earthy tones dominate, such as browns, greens, and deep reds. These colors create a warm and inviting atmosphere.
Personal Touches: Finally, personal touches like family photos in wooden frames, handmade ceramics, or heirloom kitchen tools can make the space feel even more inviting and unique.
This page contains product affiliate links. We may receive a commission if you make a purchase after clicking on one of these links at no additional cost to you. We appreciate your support.
How We Built A Button-Operated A-frame Cabin (Video)
Check out this post and video about how we built our latest remote-operated A-frame Cabin in just 1 month.
Video’s script:
Hello! We’re Alla and Garrett and welcome to the HohnStead Glamping Cabins Resort.
This is our newest cabin called the Stargazer.
Recently we decided to knock down our beloved Shanty Cabin, which was 12 years old and the first thing we built on this property. We did so because of our incredible mountain views and we thought we could do better with this section of our property.
So as you come around the corner, you're going to notice a lot of things if you compare to the Shanty Cabin that have stayed the same. For example, this garden rock wall, the deck, and even the gooseberry plant we tried our best to incorporate into the new build.
I didn't want to work too far backward so we made some modifications after the Shanty’s tear-down. We didn't have to totally backtrack which included building up the platform to match the old Shanty platform.
After we had taken off the composite deck so this portion here used to be part of that 270° walk-around deck, we brought the structure - the Stargazer - all the way back to the corner. We retained this deck, which also included the tree, we didn't want to knock down. So we kept the tree, built a deck around it, and then we came up with a Stargazer.
Initially, much like the A-frame Cabin, it had a wing but the A-frame uses 2x3 lumber and this has 2x4 and it proved to be a little bit too heavy for some people to lift. So I came up with the idea to use a winch from Harbor Freight It was $80.
Since I've already got the solar panel, the charge controller, the 12v battery, the winch made a really easy addition and it's super easy to use and super safe.
This would have been the west-facing part of the deck that took in the Shanty Cabin and if you look here you can see some of the Shanty joists and The Shanty platform actually stuck out here. The original Shanty platform was 8x12 and it went that way and it had a view out front and the door out front. But of course, in typical DIY fashion, we saved a lot of components and one of those components was the door.
So the door is a 180-degree different approach from The Shanty before, but there was a reason because we wanted it to be an approach where you just have a single step up onto it. This creates less of an opportunity for people to fall. We like this 15-in kind of stoop and using the hanging chads from 6 and 1/2 foot composite which makes your eight foot there so it's just tidy and it keeps some of the dirt out in here.
We opted for a queen-sized bed where the A-frame Cabin and the Blind Cabins both have singles that you enter down the center. We intentionally built a low profile bed so that way as you came up, it wouldn't eat up so much space so tall people can easily walk past it.
It is about 12 to 14 by 12 to 14, I can't remember which direction, but a HohnStead feature that we always use is the live edge because my dad's got a sawmill. We got plenty of standing dead timber on the property and it's just funky and cool it's a lot different than the store-bought lumber.
Coleman cook stove for your coffee and tea and two gallons of drinking water in the kitchenette.
An old window from The Shanty has some scratched screens where a bear actually tried to get into The Shanty. So it's kind of a fun story for new guests staying in the Stargazer.
A nice, tidy install of the solar components here. Xantrex charge controller which is actually approaching 20 years. So if this ever goes, I'll take that and I'll just replace it with another one cuz it's been fantastic design-wise.
It was important for us to differentiate the Stargazer from the A-frame and from the Blind Cabins, so we built a 100% wing wall, save for the top portion that has the solar panel on top and sheet metal. But on the other side, we put polycarbonate and that's why we call it the Stargazer so that you can see the stars at night.
Another one of the design components that we thought was kind of clever — with the orientation of the land is when you approach from the behind of the cabin coming in, we have the sheet metal that goes up 8 ft and it didn't require any cuts so it does provide privacy. The polycarbonate is cut in sections of four and polycarbonate comes in eights, so we just cut it in half, and in doing so, this eliminated any waste we might have from that part of the build.
On the back side of the door wall, there are towels, different books, and information about the area.
The door, as seen previously, is the goalie stick (from my hockey hobby) that's cut down. I thought it was kind of cool kind of a cool look.
But I guess the defining feature of the Stargazer that separates it from the A-frame and the Blind, again going back to that heavy door wall, we had to engineer something lighter, safer, and easier. They have winches that are remote-activated this is one of them.
In terms of color choices, I personally wanted the Stargazer Cabin to stand out in photos. I also did not want to use a color that none of our other cabins or the Commons Area has, so we decided to go with red. Red is bright and vibrant when it comes to standing out among the green forest.
So we actually went to Home Depot, looking for color, and they have this wonderful section called “Oops Paint.” It's paint that other people decided not to purchase. So on that fateful day, we had a red oops paint, and the other colors just kind of organically evolved.
We also had white we had gray from other projects, and looking on Pinterest (the way I always do), those colors always look great together. I also liked the idea that Stargazer would be clean and bright and that's where white and gray came in.
When it was all said and done, I didn't really like how everything looked very geometric and linear, so I just freehanded some curvy kind of vines and cute little flowers.
Most importantly, we wanted to have a color scheme that people coming on vacation, don't always have in their homes. When we travel, we want to see places that are unique and extraordinary so we wanted to give them a funky little getaway in the forest, where they would enjoy stargazing and unplugging from real life.
Through a lot of DIY projects, we have learned a lot of different skills and one of the other skills that I have incorporated in this build was making some homemade curtains. I had this really cute cherry material from South Korea, so I decided to create some DIY curtains for the Stargazer.
We wanted a low-profile bed, to allow for extra space to walk around the bed. So instead of buying, we just decided to make our own. We had some extra lumber from The Shanty: the studs, and the 2x6s in the walls while not 8 ft we couldn't use them in a lot of projects, but something like this was super simple. We used OSB on the top and OSB on the bottom and we classed It up by using some cabinet board all the way around. So we're really only out a single sheet of cabinet board which is the expensive part and then a couple of sheets of OSB. We added some supplemental mood light under the bed.
The item that took the most consideration when developing the Stargazer was the rigging system and how it would work with the wing wall. A couple of things we hit snags on was drilling holes with the augur on the tractor. We're in super rocky soil and we already had an existing garden bed around it. We couldn't go over the rock wall with dissecting it and pulling all that stuff out and then you also run the risk of actually hitting your deck with the augur.
Another thing we didn't want is the Aframe with the rope pulley system, which is great for the A-frame, the rigging is out of the way, and the poles are out of the way, but here we would have a pull on the side of the deck and then again back to that garden thing.
We're dealing with a longer cabin, which gets us into custom lumber territory, well past 12 ft so 14, 16 ft. So you have to have a pretty hefty header for that. We also thought about a center pull, which was kind of tough to get the rigging right with the lengths of the ropes and the pulley and just being heavy in general.
Then I thought, you know we're always pulling up logs with the winch and such and those are really powerful. We had the 12v all the infrastructure with the solar panel and the battery, so let's try a winch.
I really like the way that the supports kind of tie back into the building, giving it another kind of triangle look. I use the studs on the inside to brace it up here and here and then brace it up against the building again.
We put the header on top that provided a little bit extra length so we didn't get too blocked there. When the wall is up it gets us about 6'2 - 6'3 so most people can walk underneath of it and it’s still pointing down enough so if you were to leave it up, the rain would fall off the end.
I think what would be a little bit better, though you'd be sacrificing a little bit of safety, is shortening the beam and going in between the braces. I think it'd be a cleaner aesthetic, but we do gain some height by having the header on top and then having the iron and the lag bolts is also safer. So, a minor consideration but I think it looks pretty cool.
Thank you for watching our video we hope to host you right here in Bonner, Montana at The HohnStead Glamping Cabins Resort.
Building a DIY Stargazing A-frame Cabin with a Remote-Operated Wall in Just 1 Month
We recently deconstructed an old cabin and re-built a new, stargazing cabin. Check out how fast we did it.
From a $400 Rustic Cabin to a Stargazing A-frame with a unique, remote-operated side=wall, our experience and practice building tiny structures has come a long way and we’re so proud to show off and rent out our newest cabin - The Stargazer.
Quick story first.
Back in 2010, we bought this bare land in Bonner, Montana. At that time, this property didn’t have roads, buildings, electricity, septic, or running water - it was just trees and lots of them.
Garrett, visiting for a few months from his teaching job in South Korea picked a remote section of the land and built a very basic, very rustic cabin, which we later called The Shanty. The Shanty was built for $400 and had a loft, where we slept and a downstairs area with a tiny table, chairs, sink, and countertop space.
In 2017, The Shanty went up on Airbnb as a “let’s see what happens,” but to our surprise guests came and they loved it here. We initially thought we were too far from Missoula, Montana for them to want to stay here, but they surprised us with incredibly complimentary reviews, and comments, and a small business was born.
Over the years, we have built other tiny structures on our property, now with the idea to host more people here and to create a vacation destination for couples traveling with pets.
A cabin, that was an inspiration for The Stargazer cabin, was our 2017 cabin - Transforming A-frame. We bought the plans from tiny house designer Derek Diedricksen for just $30 and in three weeks we were able to complete the 80 sq. ft. A-frame cabin. We ended up using a lot of recycled materials during that construction, so our total cost there was just $700 and after posting about it on Alla’s blog, The Transforming A-frame Cabin went VIRAL!
We couldn’t believe the success of the A-frame cabin, the love it got from our guests, the coverage it got from huge platforms like Zillow and Airbnb, famous vloggers like Kirsten Dirksen and Eva Zu Beck, and of course financially, our small business was growing rapidly, so much so, we were able to quit our jobs abroad and make The HohnStead Glamping Cabins our primary source of income.
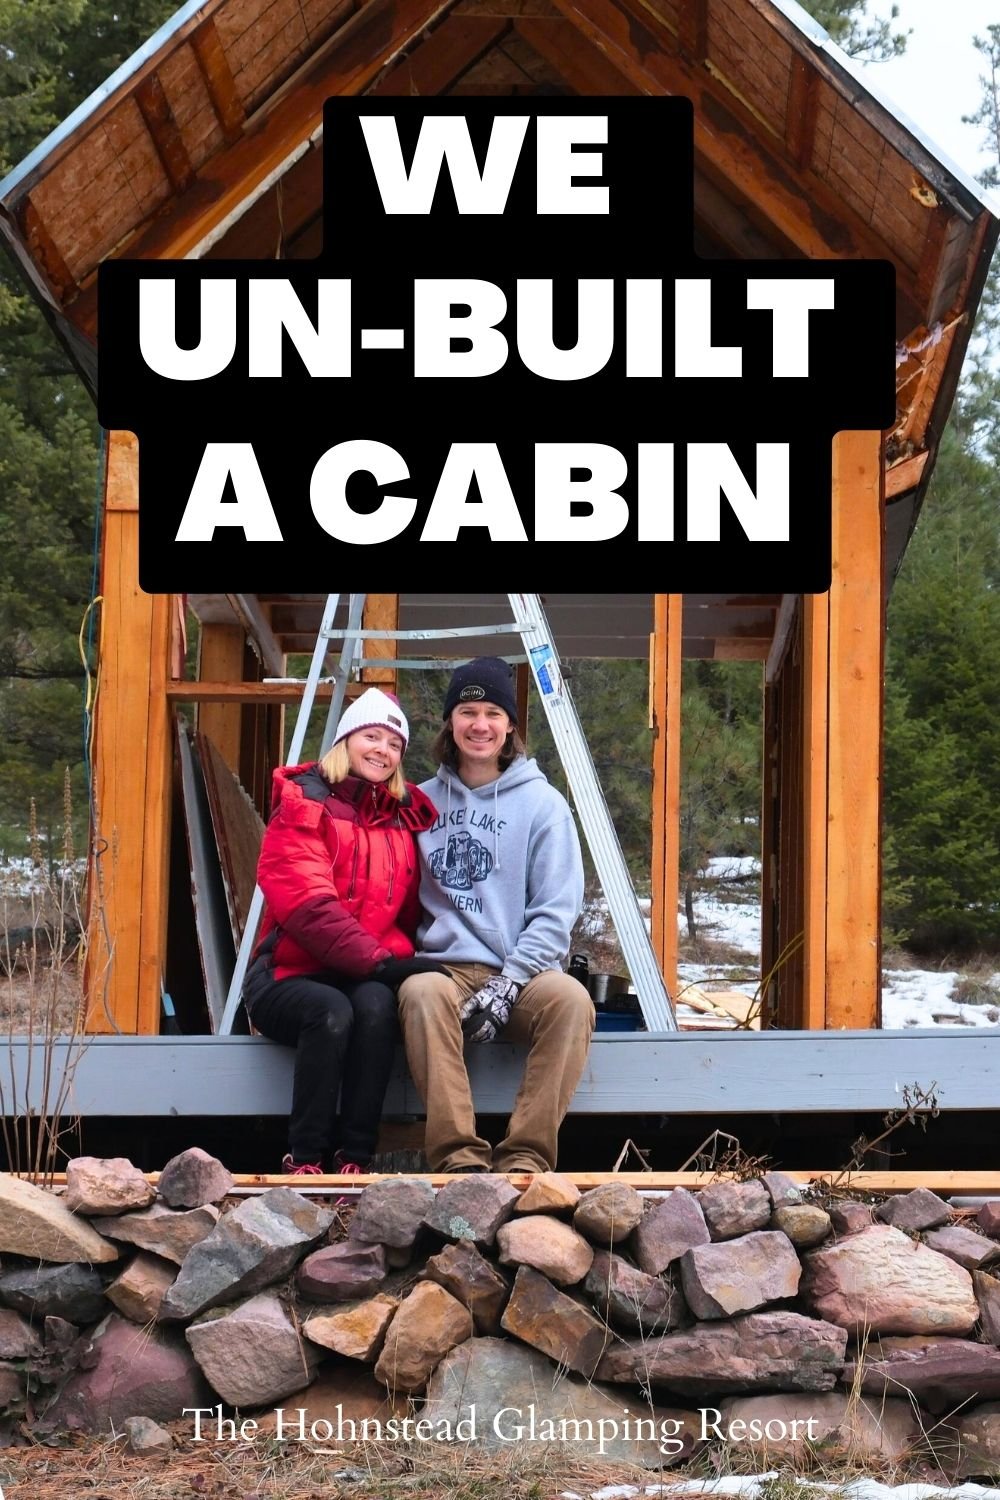
Fast forward to January of 2024, when we decided to say goodbye to our least popular cabin The Shanty. We felt that it served our purposes well, by being our shelter during the first few years of owning our property, then acting as a brew shack for Garrett’s Homebrewing, and eventually a short-term rental cabin on Airbnb. Because we’re not interested in keep building more cabins, we wanted to take advantage of The Shanty’s remote and beautiful location, but with an improved cabin.
We understand the importance of stargazing for our guests and our secluded property has incredible stargazing opportunities. So, the importance of clear roofing or a skylight was a high priority for the new cabin.
Analyzing the popularity of our transforming A-frame cabin, we decided to build a similar structure, but larger, re-using The Shanty’s materials if we could and re-working the rigging system on the lift-able door wall.
But first, the deconstruction…
Deconstruction was tedious and dirty, but we ended up salvaging a lot of boards, panels, a window, a door, roofing, trim, and other items that we didn’t have to buy/make when building The Stargazer in its place.
Between deconstruction time and building time, a few months passed (winter in Montana is cold and snowy, so we used it as an opportunity to travel and plan The Stargazer build). We were so eager to return and get our hands dirty again.
Not liking to backtrack, it was important for us that we could reuse the existing deck and Shanty’s platform. The Shanty’s platform was full 3 inches above the old deck so the composite decking was pulled up and custom-cut joists were added atop the old joists in order to bring the low parts up to level. We also used this as an opportunity to firm up and reinforce some areas that needed attention.
Once the platform was up to speed, the As were put into place. We designed the Stargazer to make use of commonly available lumber sizes. The A’s are 2x6x12ft and the outside ones seen here we laid out using a shop floor to ensure accurate angled cuts.


Once the two outside As were placed in position and plumber, the rest of the 2x4s went into place rather quickly.
We decided to go with a vibrant color scheme, obtaining two gallons of reds from Home Depot’s “Oops Paint” Section.
Because of the existing deck and garden rock walls (i.e. we wouldn’t have the benefit of working out of a tractor’s bucket), careful consideration had to go into the order in which the polycarbonate, sheet metal, and ridge cap would be installed.

The interior colors and scheme were inspired by Pinterest color combinations, attempting to keep it bright, fun, and playful. We believe that vacation destinations must vary greatly from our home situations, so a plain or minimalist color scheme was out of the question. We also rely heavily on the existing colors in our DIY pantry and buying a brand new color would be wasteful when trying to do maintenance on five of our cabins and Commons Area Lounge.
“An ounce of prevention equals a pound of cure.” someone way smarter than me once said.
One of the sheets of old OSB had some sponge to it so we popped it right up and replaced it. Being a full sheet replacement not requiring any cuts, the entire job maybe took 30 minutes and helps us sleep much better at night.
The other A-frame on our property has two single beds, which push and click together. For this new A-frame design we wanted to vary it from the existing A-frame and also opted to re-use the Shanty Cabin’s mattress. We searched for a while for a bed frame, but due to the sloped walls of this cabin, we decided to build something low profile ourselves.
We were able to re-use the milled lumber from the inside The Shanty’s walls for the recessed bottom section of the bed frame. Solar LED lights create a nice ambiance in the evening/night (not pictured). The visible exterior sections of the bed frame were created by store-bough cabinet board. Interior/unseen sections of the bed frame were made from re-used OSB boards. A pretty simple bed frame without the headboard, which came together in just a few hours.
We contemplated to build storage into the bed frame, but decided against it keep the cleaning to a minimum and possibility of mice invasion low.


Year built: 2024
Size: 168 sq ft
Type: A-frame
Insulation: No
Bathroom: No (shared bathrooms are within 1 minute walk)
Kitchenette: yes
(full kitchen available 1 minute away in the Commons Area Lounge)
Stargazing: 2 translucent panels
Dog friendly: yes
Bed: Queen size
Special feature: Remote-operated translucent door-wall
Purpose: Short term rental unit / glamping cabin
Build duration: around 35 days
Materials Cost: around $1100 with a lot of re-used materials from the previous cabin
If you’re interested in staying at this stargazing tiny cabin in the woods, remember that you can bring your pet, then explore 100+ acres of our forested property. After the hike, soak your stresses away and gaze at the stars from a hot tub. Are you ready to unplug and stargaze?
How to Deconstruct a Tiny Cabin in Just 7 Days
Our first demolition at The Hohnstead, check out this post and video we made just for you.
When Garrett and I travel, we go into our “flow state.”
We usually walk the streets of a new city, with or without aim and we always find ourselves talking about The Hohnstead, our Glamping Cabins Resort.
We discuss what’s working and what doesn’t. What needs to be fixed or built, or as in this year’s upgrade - a cabin demolition in order to build a new cabin, which would better serve our seasonal guests.
This demolition project was the first for us and it took about a week to complete.
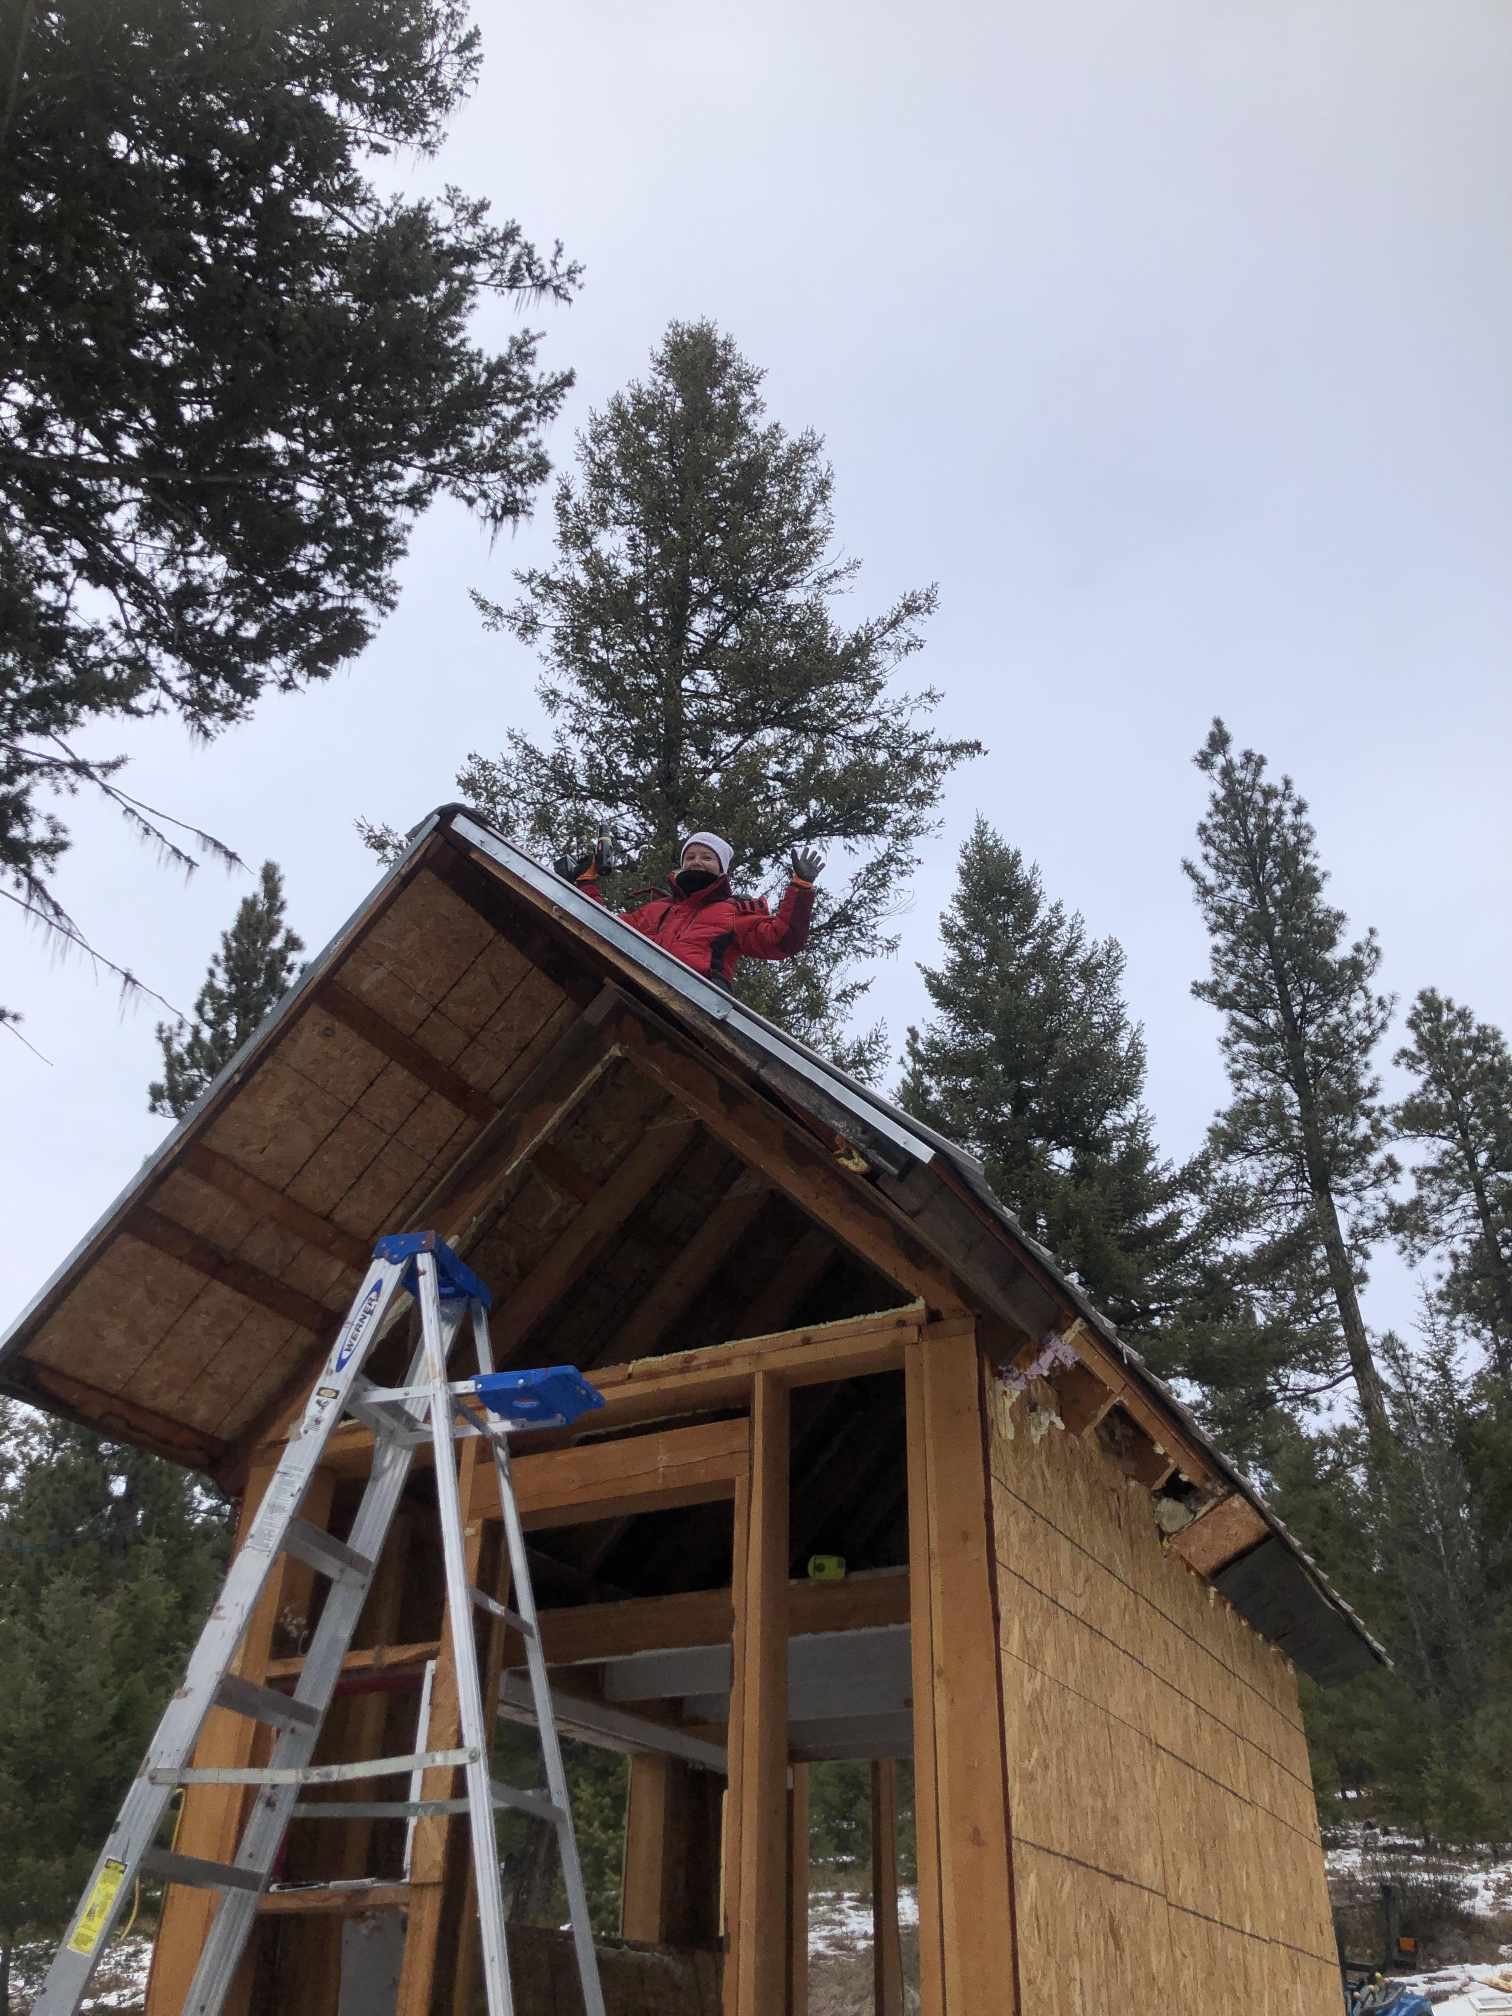
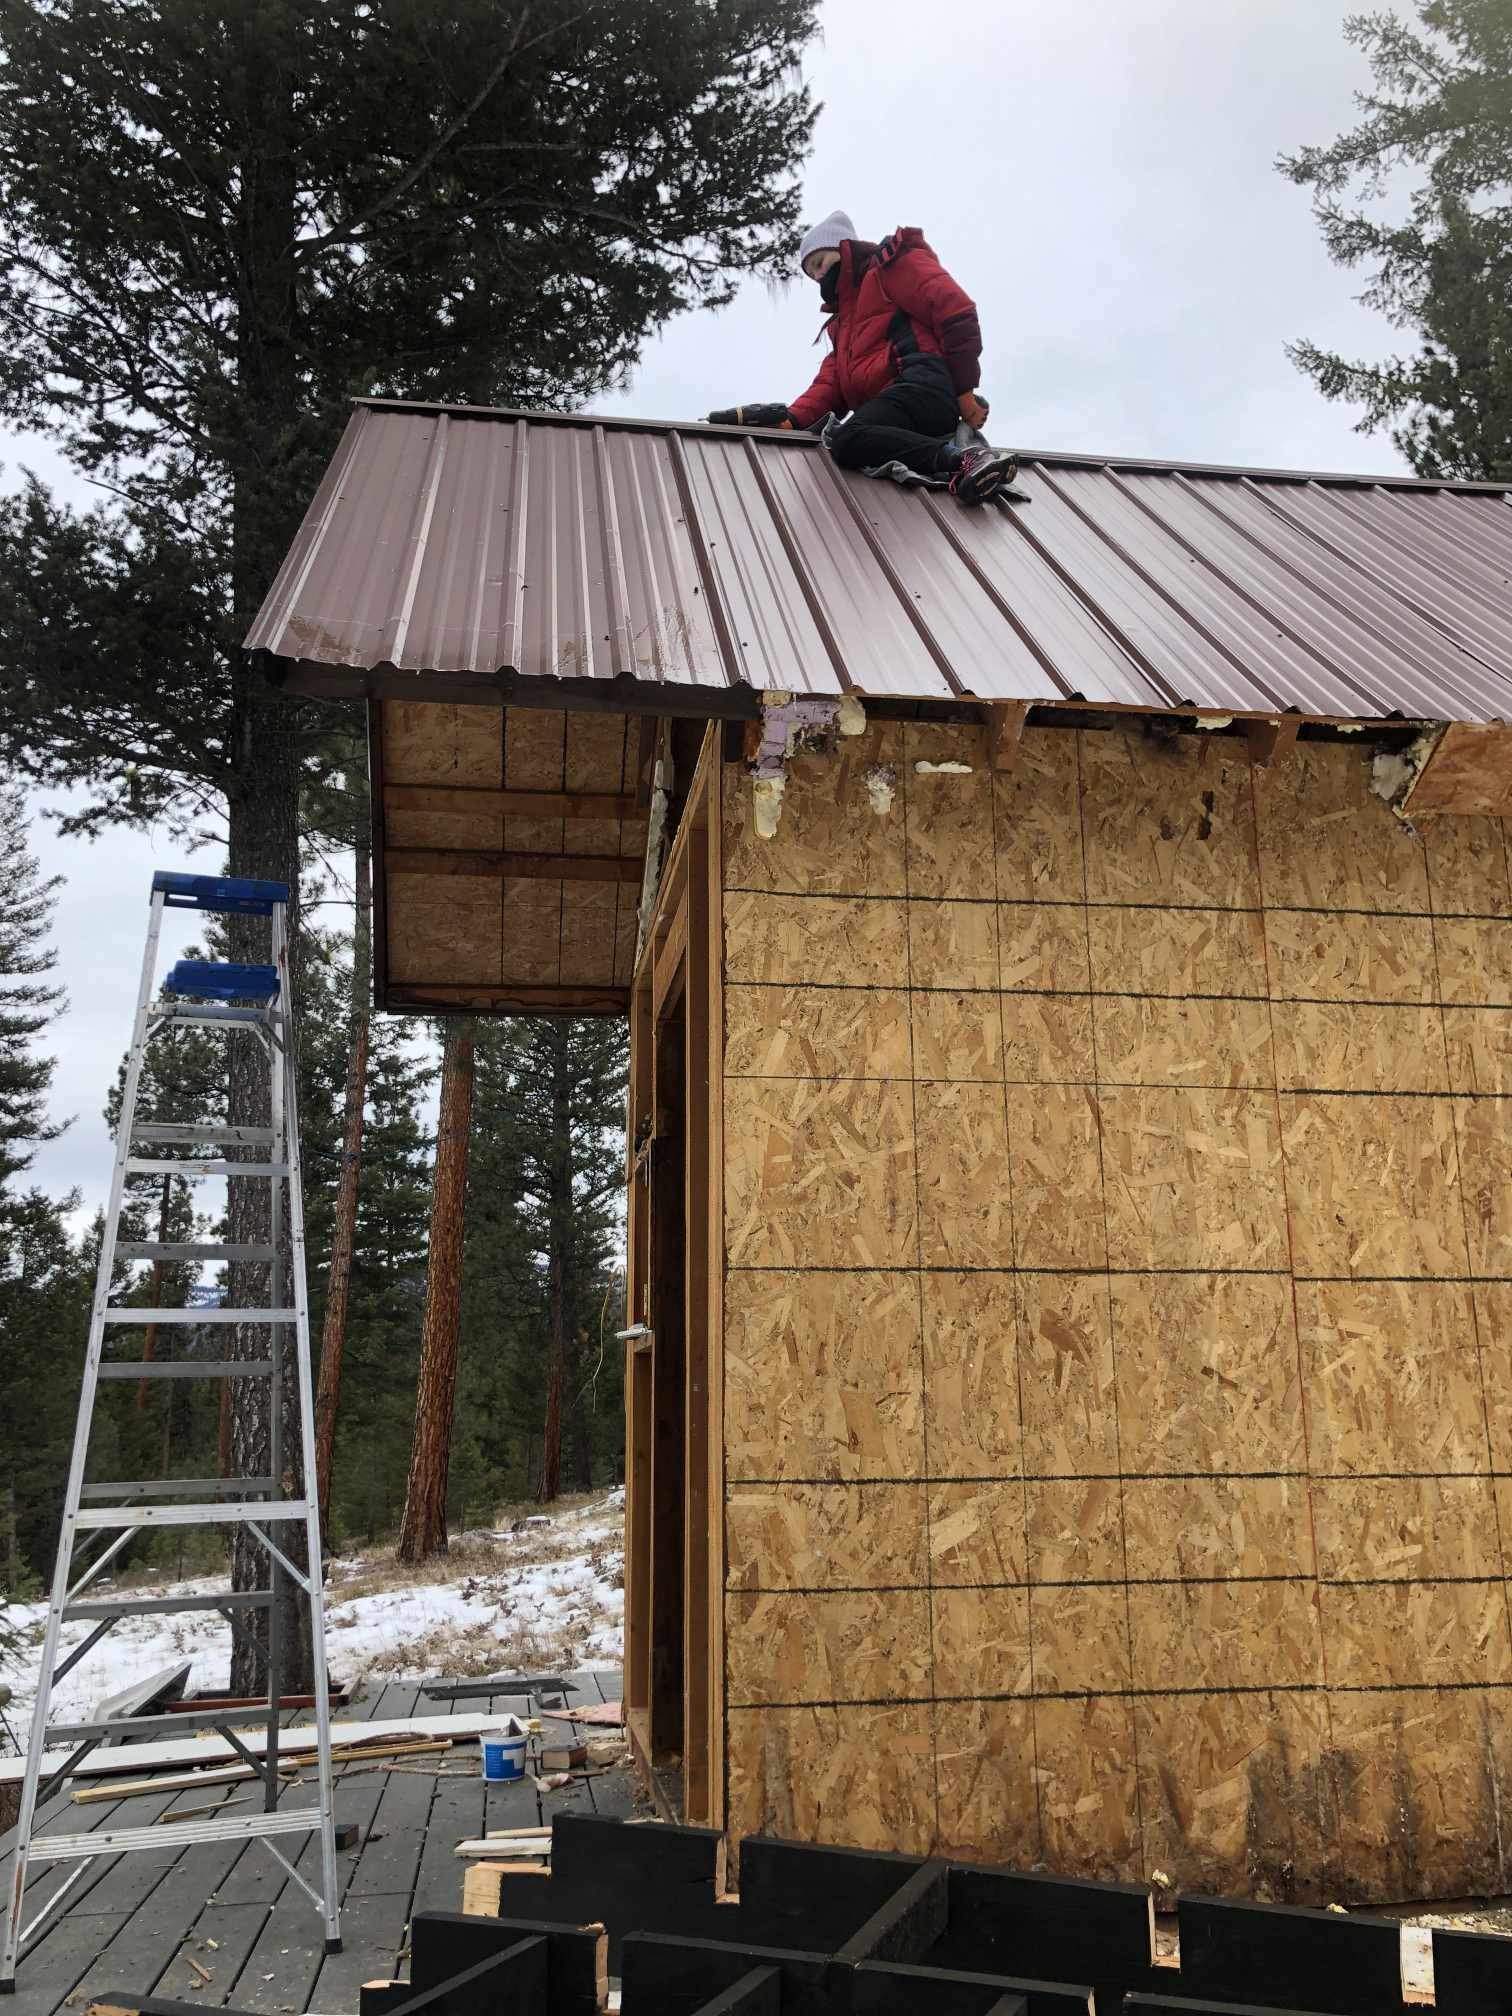
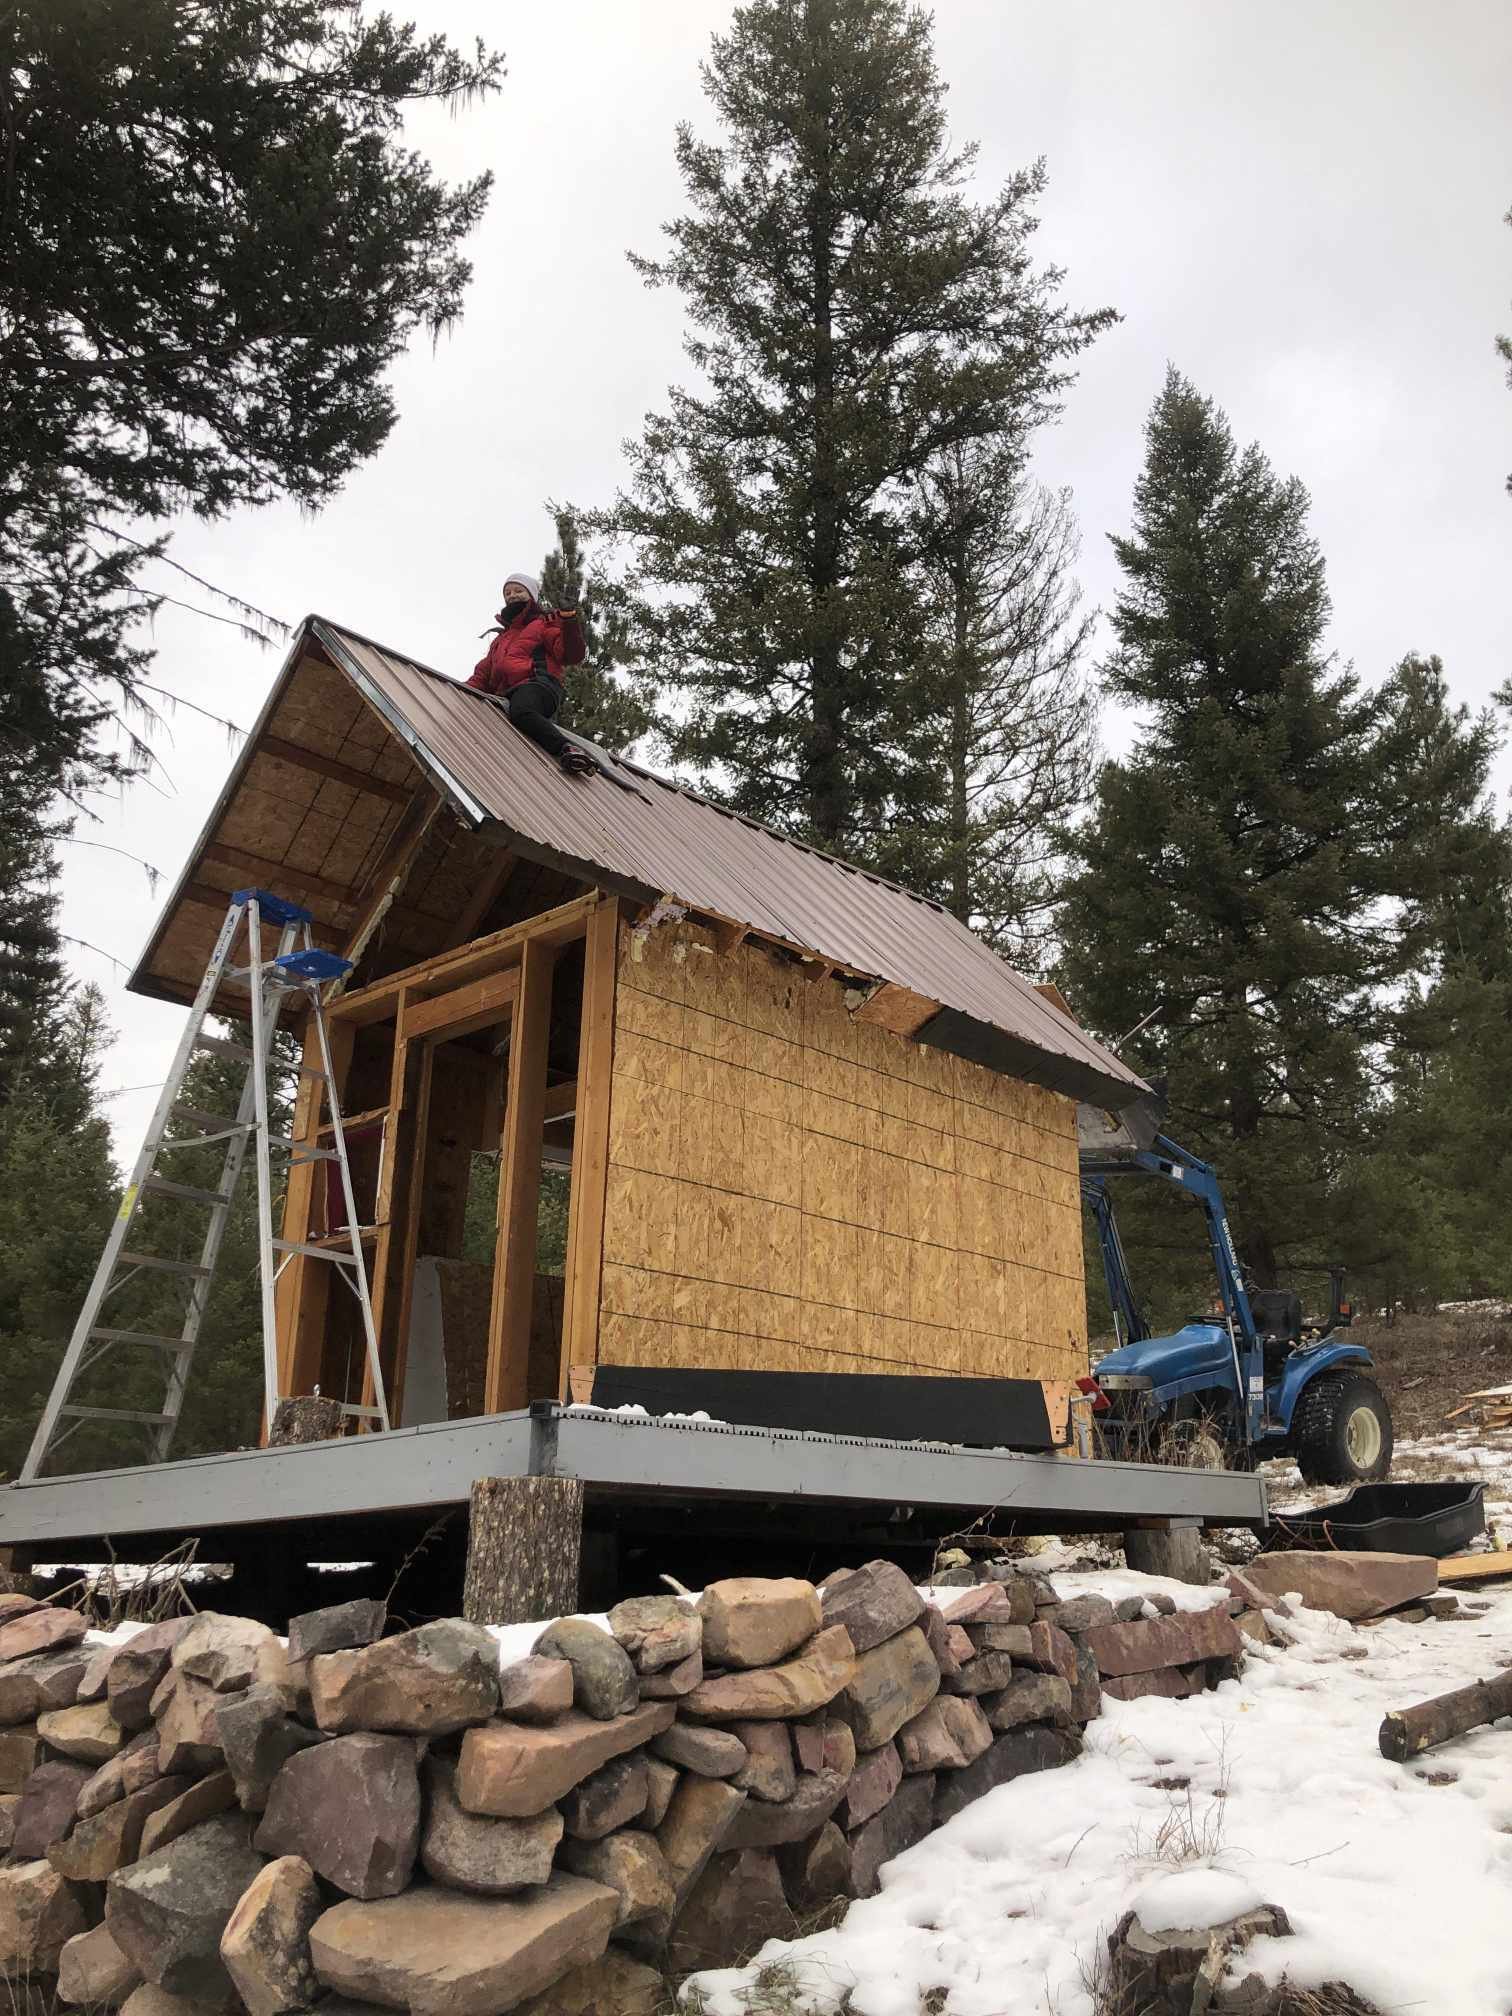
My most favorite (and scariest) moment during this cabin demolition came when Garrett instructed me to get onto the roof in order to take off the screws of a ridge cap.
Uh-oh!
A chance to ride the metal stallion?
A chance to fall off and never have to do another construction project again?
A chance to do “a job” that may put my husband in jeopardy due to his poor hips flexibility?
What you don’t see here is that it took me 10 minutes to talk myself into making the leap from the tractor onto the OSB board and onto the roof. With no supports, safety harnesses, or stunt doubles…
Either way, it needed to be done and we got it done! Getting off that thing was my favorite <3
Shanty Deconstruction at The Hohnstead Glamping Cabins Resort
Cabin Deconstruction at The Hohnstead Glamping Cabins Resort in Bonner, Montana


