Building a DIY Stargazing A-frame Cabin with a Remote-Operated Wall in Just 1 Month
From a $400 Rustic Cabin to a Stargazing A-frame with a unique, remote-operated side=wall, our experience and practice building tiny structures has come a long way and we’re so proud to show off and rent out our newest cabin - The Stargazer.
Quick story first.
Back in 2010, we bought this bare land in Bonner, Montana. At that time, this property didn’t have roads, buildings, electricity, septic, or running water - it was just trees and lots of them.
Garrett, visiting for a few months from his teaching job in South Korea picked a remote section of the land and built a very basic, very rustic cabin, which we later called The Shanty. The Shanty was built for $400 and had a loft, where we slept and a downstairs area with a tiny table, chairs, sink, and countertop space.
In 2017, The Shanty went up on Airbnb as a “let’s see what happens,” but to our surprise guests came and they loved it here. We initially thought we were too far from Missoula, Montana for them to want to stay here, but they surprised us with incredibly complimentary reviews, and comments, and a small business was born.


Over the years, we have built other tiny structures on our property, now with the idea to host more people here and to create a vacation destination for couples traveling with pets.
A cabin, that was an inspiration for The Stargazer cabin, was our 2017 cabin - Transforming A-frame. We bought the plans from tiny house designer Derek Diedricksen for just $30 and in three weeks we were able to complete the 80 sq. ft. A-frame cabin. We ended up using a lot of recycled materials during that construction, so our total cost there was just $700 and after posting about it on Alla’s blog, The Transforming A-frame Cabin went VIRAL!


We couldn’t believe the success of the A-frame cabin, the love it got from our guests, the coverage it got from huge platforms like Zillow and Airbnb, famous vloggers like Kirsten Dirksen and Eva Zu Beck, and of course financially, our small business was growing rapidly, so much so, we were able to quit our jobs abroad and make The HohnStead Glamping Cabins our primary source of income.
Fast forward to January of 2024, when we decided to say goodbye to our least popular cabin The Shanty. We felt that it served our purposes well, by being our shelter during the first few years of owning our property, then acting as a brew shack for Garrett’s Homebrewing, and eventually a short-term rental cabin on Airbnb. Because we’re not interested in keep building more cabins, we wanted to take advantage of The Shanty’s remote and beautiful location, but with an improved cabin.
We understand the importance of stargazing for our guests and our secluded property has incredible stargazing opportunities. So, the importance of clear roofing or a skylight was a high priority for the new cabin.
Analyzing the popularity of our transforming A-frame cabin, we decided to build a similar structure, but larger, re-using The Shanty’s materials if we could and re-working the rigging system on the lift-able door wall.
But first, the deconstruction…
Deconstruction was tedious and dirty, but we ended up salvaging a lot of boards, panels, a window, a door, roofing, trim, and other items that we didn’t have to buy/make when building The Stargazer in its place.
Between deconstruction time and building time, a few months passed (winter in Montana is cold and snowy, so we used it as an opportunity to travel and plan The Stargazer build). We were so eager to return and get our hands dirty again.


Not liking to backtrack, it was important for us that we could reuse the existing deck and Shanty’s platform. The Shanty’s platform was full 3 inches above the old deck so the composite decking was pulled up and custom-cut joists were added atop the old joists in order to bring the low parts up to level. We also used this as an opportunity to firm up and reinforce some areas that needed attention.

Once the platform was up to speed, the As were put into place. We designed the Stargazer to make use of commonly available lumber sizes. The A’s are 2x6x12ft and the outside ones seen here we laid out using a shop floor to ensure accurate angled cuts.


Once the two outside As were placed in position and plumber, the rest of the 2x4s went into place rather quickly.
We decided to go with a vibrant color scheme, obtaining two gallons of reds from Home Depot’s “Oops Paint” Section.

Because of the existing deck and garden rock walls (i.e. we wouldn’t have the benefit of working out of a tractor’s bucket), careful consideration had to go into the order in which the polycarbonate, sheet metal, and ridge cap would be installed.


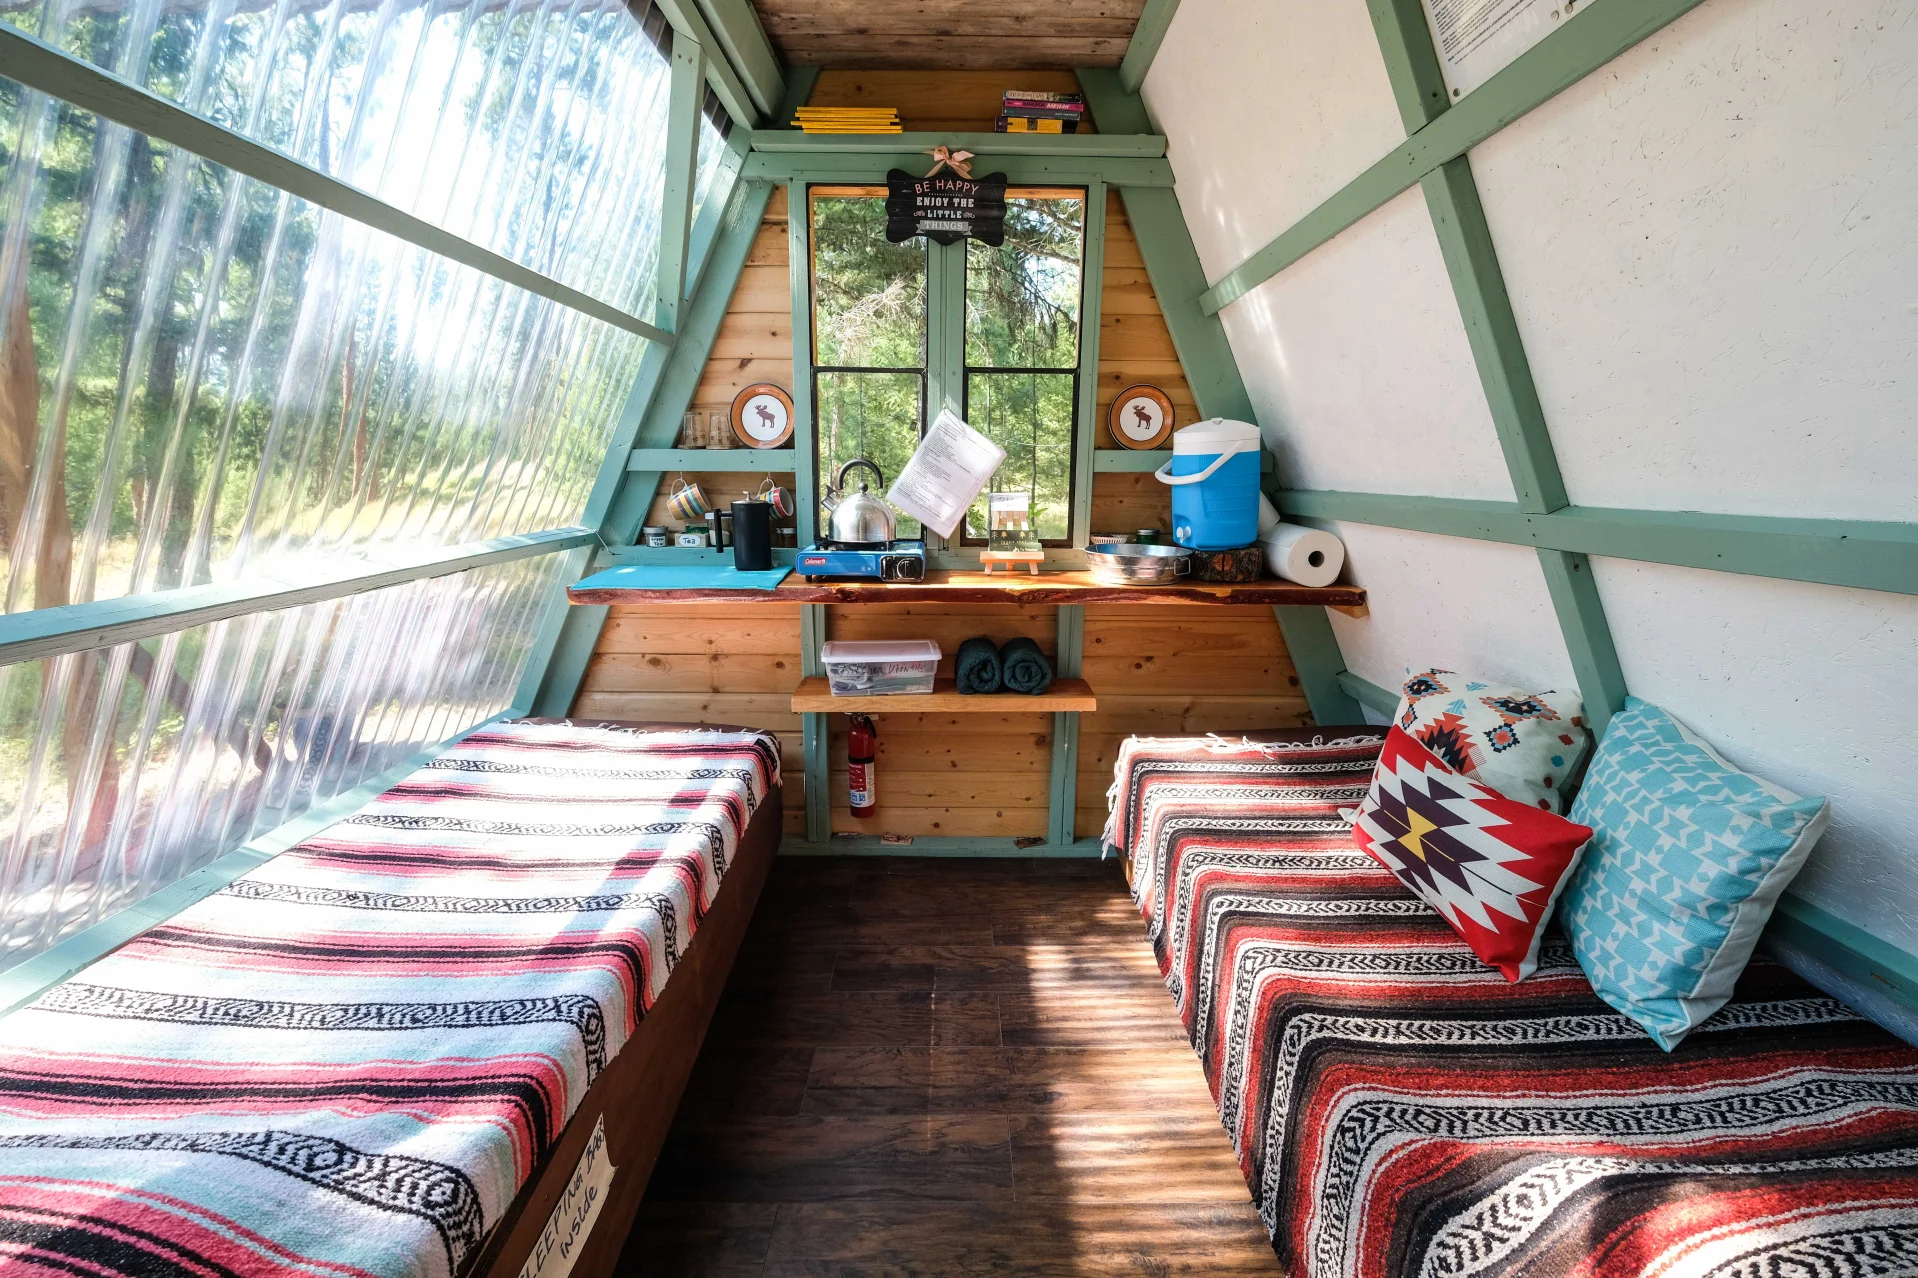
The interior colors and scheme were inspired by Pinterest color combinations, attempting to keep it bright, fun, and playful. We believe that vacation destinations must vary greatly from our home situations, so a plain or minimalist color scheme was out of the question. We also rely heavily on the existing colors in our DIY pantry and buying a brand new color would be wasteful when trying to do maintenance on five of our cabins and Commons Area Lounge.
“An ounce of prevention equals a pound of cure.” someone way smarter than me once said.
One of the sheets of old OSB had some sponge to it so we popped it right up and replaced it. Being a full sheet replacement not requiring any cuts, the entire job maybe took 30 minutes and helps us sleep much better at night.


The other A-frame on our property has two single beds, which push and click together. For this new A-frame design we wanted to vary it from the existing A-frame and also opted to re-use the Shanty Cabin’s mattress. We searched for a while for a bed frame, but due to the sloped walls of this cabin, we decided to build something low profile ourselves.
We were able to re-use the milled lumber from the inside The Shanty’s walls for the recessed bottom section of the bed frame. Solar LED lights create a nice ambiance in the evening/night (not pictured). The visible exterior sections of the bed frame were created by store-bough cabinet board. Interior/unseen sections of the bed frame were made from re-used OSB boards. A pretty simple bed frame without the headboard, which came together in just a few hours.
We contemplated to build storage into the bed frame, but decided against it keep the cleaning to a minimum and possibility of mice invasion low.


Year built: 2024
Size: 168 sq ft
Type: A-frame
Insulation: No
Bathroom: No (shared bathrooms are within 1 minute walk)
Kitchenette: yes
(full kitchen available 1 minute away in the Commons Area Lounge)
Stargazing: 2 translucent panels
Dog friendly: yes
Bed: Queen size
Special feature: Remote-operated translucent door-wall
Purpose: Short term rental unit / glamping cabin
Build duration: around 35 days
Materials Cost: around $1100 with a lot of re-used materials from the previous cabin
If you’re interested in staying at this stargazing tiny cabin in the woods, remember that you can bring your pet, then explore 100+ acres of our forested property. After the hike, soak your stresses away and gaze at the stars from a hot tub. Are you ready to unplug and stargaze?


